

It can feel quite daunting when deciding whether or not to embark on an interior or architectural design project, and the following questions often arise:
The list goes on. Since this process can feel overwhelming to potential clients, we’re breaking down the process we follow during any project phase-by-phase. From pre-design to concept, bidding to the grand finale, here’s how and what the difference phases are in the design process for us!
Phase 1 of every project can take 1-2 weeks to complete, depending on the project scope, and during this phase is when we gather as much information and data as possible to set the project's parameters and manage our clients’ expectations. Due to all the decisions that are made during this phase, it is, by far, the most important phase of any project. Why? The answer really comes down to budget and expectations! If you make mistakes here, the overall budget, and client expectations can be negatively affected. Mistakes made during this phase can also lead to costly revisions. For this reason, we really dig deep and develop our client relationship to keep everything on track.
Question we ask during this phase: One of the first questions we ask during the pre-design phase is, “Is this your forever home?” The answer to this question will establish the drive behind the renovation as well as some key choices. We always strive to make a return on investment for our clients, but a forever home will be a little more skewed to longevity and quality of life specific to the client than a more temporary home.
There are several steps of the pre-design phase that we go through with each client for each project, and it’s helpful to understand this process from beginning to end.
Establish a project budget: To establish a budget for the project, we first establish the scope of the project—including the level of renovation. This involves exchanging and reviewing many images in detail with the client, which enables us to quickly ascertain the required budgetary cost per foot. We then take into account the clients' expectations and their budget to ensure that all are in alignment. If expectations and budget are not in alignment, projects will often fall short of expectations or costs will exceed the budget for the project.
Understand the preferred aesthetics of the client: When exchanging and reviewing images in the budget creation phase, we also use these images and the clients’ responses to these images to better understand the aesthetic the client is drawn to. As a designer, we will also guide the client if we feel what they want to do is not the right direction based on their expectations and budget. For example, the house may be a true mid-century and the client wants traditional, which fights with the soul of the house. Or maybe the level of design does not match the home's value (and potential value), meaning the expected return on investment from an eventual sale might not be realistic.
Explore zoning issues and other project requirements: Before moving on to phase 2, we also look into any zoning issues and requirements for the project. We also review the home's price and recent sale prices of other nearby homes to help us establish the potential value of the home post-project.
Set a final budget and work schedule for the project: Once all other aspects of phase 1 have been completed, the final task for this phase is to create a realistic final budget and work schedule for the project. “Realistic” is the key word here, because any unforeseen changes can not only negatively affect the budget, but also push the completion date farther out, potentially leading to additional costs as well as headaches for the client and construction vendors.

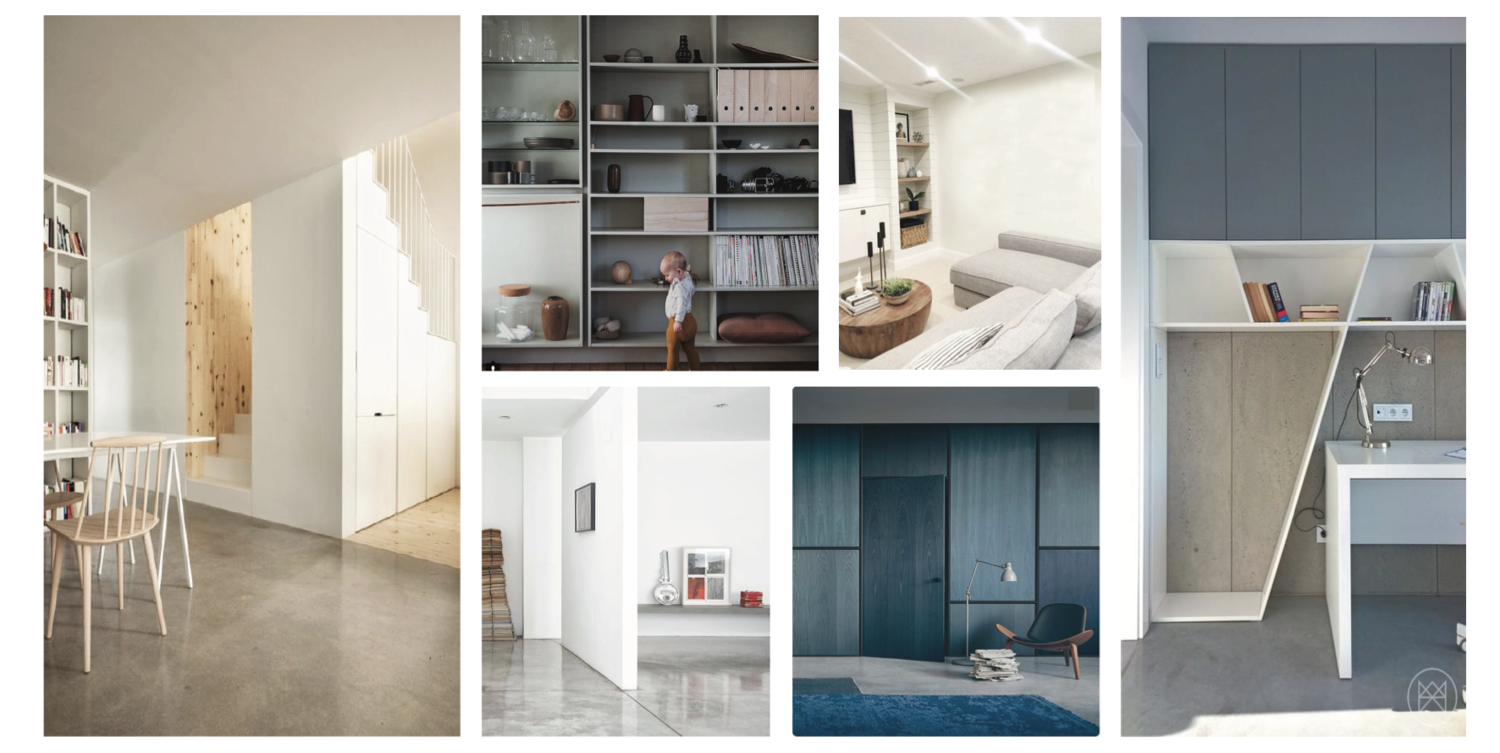
This is where we take all the info from the pre-design phase and create a refined focused concept board (or mood board) as well as a space narrative. The concept board sets the tone for design for the remainder of the project, so it is important that clients sign off on all aspects of this phase before proceeding to the next phase. We also use the concept board and reference it as we progress with the design. The concept board is fluid and may evolve (with client sign off) as we progress with the design, but it anchors the aesthetic tone for the project.

Related: Click here to learn more and see this 3D model turn into a beautiful kitchen renovation →
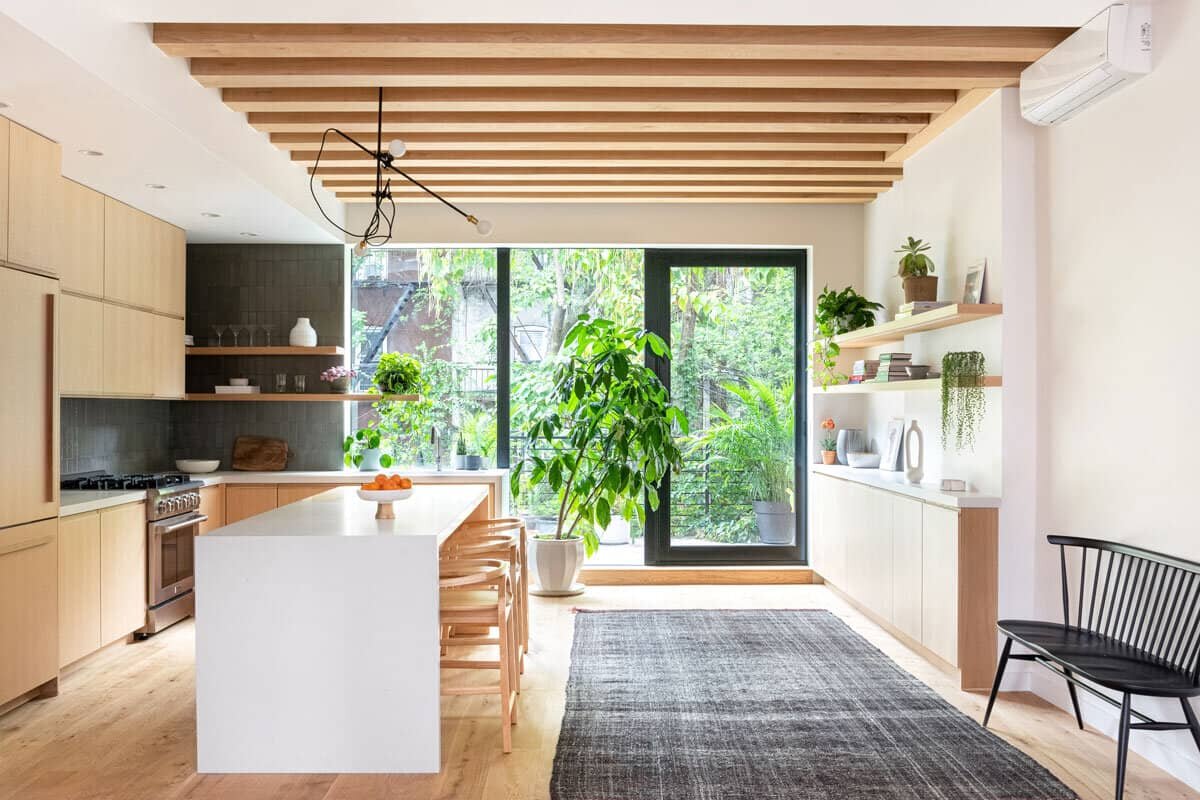
In phase 3, we communicate to the client the intent of the design, and this is where the client gets to see the design take shape in 3D. Typically, we will do 3D renderings to scale, showing the completed design, including materials and finishes. These 3D renderings are the best tools to help the client understand the complete project process, so we typically add as much detail and as many views as possible to fully portray the vision of the project. Once these renderings are approved by the client, we move to phase 4.
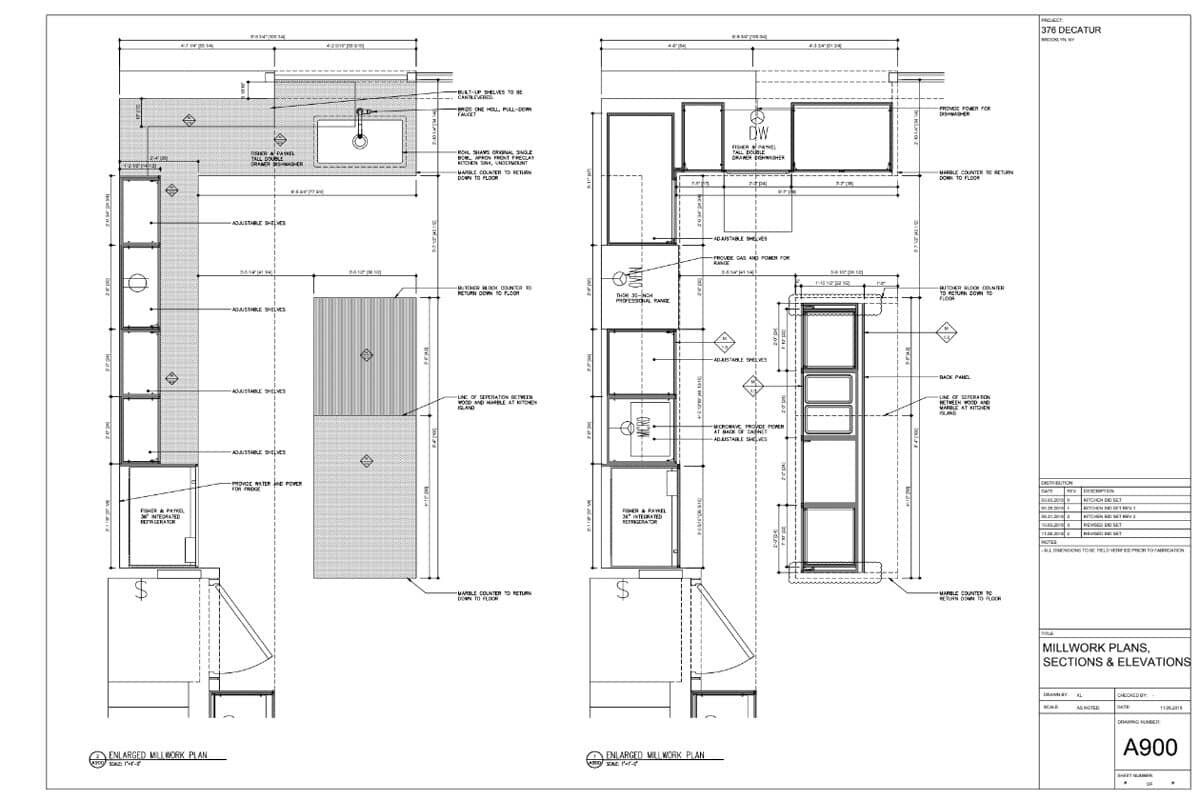
During phase 4, all construction documents are created, and all materials, colors, fixtures, fittings, and dimensions are finalized. To ensure that phase 4 goes as seamless as possible, we specify everything included in the project down to the minutest detail. All the mechanical, electrical, plumbing, and structural engineering is also completed in this phase as needed. Phase 4 is very important because the completed documents are used for the project's bidding and construction, and it is crucial that the documents created during this phase include enough detail so the contractor can deliver our intentions and so the project can be bid accurately. If a general contractor underbids a project, their margins might be too low, causing them to employ a skeleton crew, perform sub par work, request change orders to recoup losses, or a combination of all three. Fully detailed drawings and a clear process are key to a successful relationship with the general contractor and the client as well as a successfully finished product.
In phase 5, general contractors and other vendors submit quotes for the project, and designers will typically pull from their pool of trusted resources for these quotes in order to create the construction team that best matches the job criteria with the highest chances for success. Typically, obtaining three sets of bids is ideal for comparison purposes, and if phase 4 was completed efficiently, bids should be close in cost, making it easier for clients to compare apples to apples. The client has the final decision and retains the general contractor directly, with our guidance and support throughout the construction process. When deciding which bid to go with, we encourage clients to not only look at cost, but other factors to ensure the general contractor and vendors will be the best fit for the client and the project as a whole. We will also counsel clients based on our past experiences to hopefully minimize the chance of clients having to live through the horror stories we’ve experienced in the past with other projects.
Once all bids are reviewed, if project costs are higher than the budget based on the bids received, we enter the value engineering phase. During this phase, the client can redesign and/or change elements of the project to reduce costs to bring them more in line with the budget.

Once everything is signed off from all previous phases, a designer will manage the project schedule and payment process as well as the general contractor and other vendors, frequently reviewing and certifying that all work performed is in line with project documents. Our designers fight for every detail and demand nothing short of perfection for our clients.
When the project is confirmed as being complete by the general contractor and all vendors, both the designer and the clients do one last punch list, which includes everything—both large and small items—that needs to be addressed before the project can actually be deemed as complete. When all items on the punch list have been completed to the client’s satisfaction, the completion of the project is finalized, and all general contractors and vendors are issued final payments for and released from the project.
Once potential clients understand the phases in the construction process from design to completion, and with our guidance every step of the way, the concerning and often overwhelming slew of unanswered questions about a future design and construction project can easily be answered, making it possible for clients to not only achieve the home of their dreams, but also benefit from the return on investment that results from a home construction project.
While it might seem like a lot of steps, remember this is space that is purpose-driven and likely lived in for you or your clients. Our goal is to add value, solve problems, and provide transparency while giving you the bespoke design and curated spaces in your mindseye.
-1.jpg)